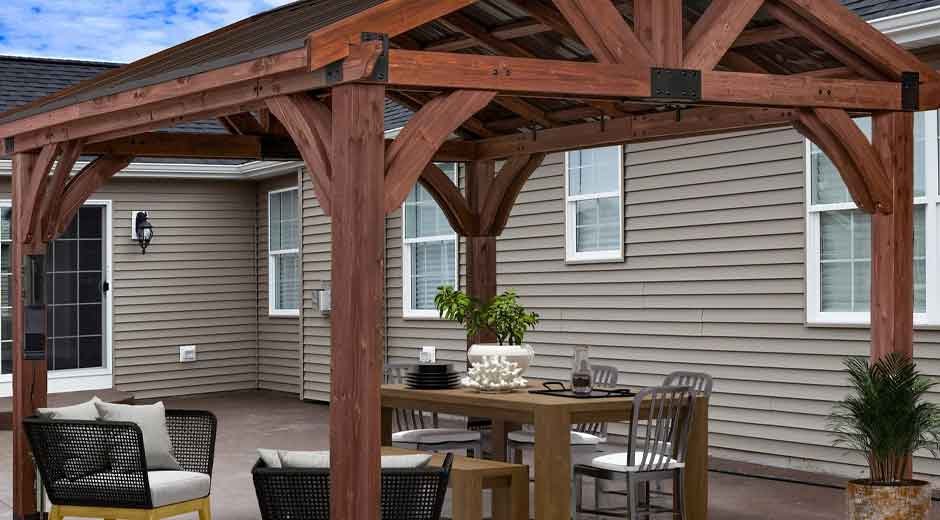
Adding a gazebo to your outdoor space can transform it into a relaxing haven, perfect for gatherings or quiet evenings. Whether you’re envisioning a shaded spot for summer barbecues or a cozy retreat during cooler months, attaching it securely to your deck or patio is crucial for stability and longevity. If you’re considering alternatives like a patio pergola, that might offer a lighter structure, but for those set on a gazebo, safety should always come first. In this guide, we’ll walk through the process step by step, ensuring you avoid common pitfalls and end up with a sturdy setup that stands the test of time.
Gazebos come in various styles, from simple pop-up models to more permanent wooden or metal frames. Attaching one to an existing deck or patio not only anchors it against wind and weather but also integrates it seamlessly into your backyard. However, improper installation can lead to structural failures, injuries, or costly repairs. That’s why understanding the fundamentals is key before diving in.
Assessing Your Deck or Patio’s Suitability
Before you even purchase a gazebo, evaluate your deck or patio to ensure it can support the additional weight and stress. Decks, typically made from wood or composite materials, and patios, often concrete or pavers, have different load-bearing capacities.
Start by checking the age and condition of your surface. For wooden decks, inspect for rot, loose boards, or weakened joists. Patios should be free of cracks or uneven settling. If your deck is elevated, confirm it meets local building codes for added structures—many require permits for attachments that alter the load.
Consider the gazebo’s size and material. A small aluminum gazebo might weigh under 200 pounds, while a larger wooden one could exceed 500. Calculate the total load, including people and furniture, and compare it to your deck’s rating. Most residential decks are designed for 40-60 pounds per square foot live load, but consult a structural engineer if you’re unsure.
Environmental factors play a role too. In windy areas, you’ll need stronger anchors; in rainy climates, ensure proper drainage to prevent water pooling under the gazebo. Snow load is critical in colder regions—gazebos can collapse under heavy accumulation if not properly supported.
If your assessment reveals issues, reinforce the area first. For decks, add blocking between joists or extra posts. On patios, level the surface with sand or gravel if needed. Skipping this step is a recipe for disaster, so take your time here.
Gathering Tools and Materials
Preparation is half the battle when attaching a gazebo. Having the right tools and materials on hand will make the job smoother and safer. Here’s a breakdown of what you’ll typically need:
- Basic Tools: Level, tape measure, drill with bits, hammer, wrenches, and a socket set. A cordless drill is ideal for efficiency.
- Specialized Items: Post anchors or brackets specific to your gazebo type, lag bolts or concrete anchors (depending on the surface), and shims for leveling.
- Safety Gear: Gloves, safety glasses, sturdy boots, and perhaps knee pads for working on hard surfaces.
- Materials: Pressure-treated lumber for any reinforcements, galvanized hardware to prevent rust, and sealant for weatherproofing joints.
For decks, opt for heavy-duty lag screws that penetrate at least 3 inches into the joists. On concrete patios, use expansion anchors or epoxy-set bolts for a secure hold. If your gazebo kit doesn’t include these, source them from a hardware store—match the size to the manufacturer’s recommendations.
Budget for extras like anti-corrosion coatings if you’re in a coastal area. And don’t forget a helper; gazebos are bulky, and lifting them alone can lead to strains or accidents.
Planning the Layout and Obtaining Permits
Once your surface is deemed ready, map out the placement. Measure the gazebo’s footprint and mark it on the deck or patio with chalk or tape. Ensure it’s centered or positioned for optimal views and access—avoid blocking doors or pathways.
Check setbacks from property lines, as many locales require a minimum distance. Also, consider utilities: Use a service like 811 to mark underground lines before drilling.
Permits are often overlooked but essential. In many areas, attaching a gazebo counts as a structural addition, requiring approval. Contact your local building department early; they might need plans showing attachment points and load calculations. This step can prevent fines or forced removals later.
While planning, think about utilities like electricity for lights or fans. Running conduits under the deck now is easier than retrofitting. If you’re adding a roof or sides, factor in how they’ll interact with the attachment—sloped roofs might need adjustable brackets.
Step-by-Step Guide to Attachment
Now, let’s get into the hands-on part. This process assumes a standard four-post gazebo; adjust for your model’s specifics. Always follow the manufacturer’s instructions as a primary guide.
Step 1: Assemble the Gazebo Frame
Build the gazebo on a flat area nearby to avoid damaging your deck. Lay out all parts and check for missing pieces. Tighten all bolts loosely at first, then fully once aligned.
For metal gazebos, use provided connectors; for wood, predrill holes to prevent splitting. If it’s a kit, the roof might come pre-assembled—handle it carefully to avoid bends.
Step 2: Position and Level the Base
Move the assembled frame to your marked spot. Use a level on multiple sides to ensure it’s plumb. Shim under posts as needed, but don’t rely on shims alone for support—they’re temporary.
For uneven patios, adjustable feet on some gazebos can help. Double-check measurements to confirm it’s square; diagonal measurements should match.
Step 3: Mark and Drill Anchor Points
With the gazebo in place, mark through the base plates onto the deck or patio. Remove the structure temporarily.
On decks, drill pilot holes into joists—avoid edges to prevent weakening. For patios, use a masonry bit for concrete anchors. Wear eye protection; dust and debris can fly.
Step 4: Secure the Anchors
Attach brackets or plates to the surface first. For decks, drive lag bolts with a wrench, ensuring they bite into solid wood. On patios, insert anchors and tighten per instructions—some expand as you torque them.
Re-position the gazebo over the anchors and bolt the posts down. Torque to specs; over-tightening can strip threads.
Step 5: Reinforce and Test Stability
Add cross-bracing if your model allows, or install guy wires for extra wind resistance. Walk around and shake the structure gently to check for wobbles—adjust as needed.
Apply sealant around bolts to prevent moisture ingress. If adding screens or curtains, do so now, ensuring they don’t strain the attachments.
This process might take a full day for beginners, but rushing leads to mistakes. Take breaks to stay focused.
Safety Considerations Throughout the Process
Safety isn’t just about the final product; it’s integral at every stage. Start with stable footing—use non-slip mats on slick patios.
When lifting, bend at the knees and use team lifts for heavy parts. Secure ladders if working on heights, and never climb the gazebo until fully anchored.
Weather-wise, avoid installing during high winds or rain; wet surfaces increase slip risks. If using power tools, ground them properly and keep cords away from walkways.
Post-installation, inspect regularly for loose bolts, especially after storms. Teach family members not to hang or swing from the structure—it’s not a playground.
In earthquake-prone areas, flexible anchors can absorb shocks better than rigid ones. Fire safety matters too; keep grills at a safe distance to avoid igniting the gazebo.
Common Mistakes and How to Avoid Them
Even experienced DIYers slip up, so learn from others’ errors.
- Underestimating Weight: Always overestimate loads. A gazebo party can add hundreds of pounds—reinforce accordingly.
- Ignoring Codes: Skipping permits might save time initially but cost more later. Research local rules thoroughly.
- Poor Leveling: An unlevel base leads to stress fractures. Use quality levels and recheck often.
- Using Wrong Hardware: Mismatched bolts fail quickly. Stick to galvanized or stainless steel for outdoors.
- Neglecting Maintenance: Annual checks prevent small issues from becoming big ones. Clean gutters and reseal as needed.
By anticipating these, you’ll sidestep headaches and ensure a safe attachment.
Maintenance for Long-Term Durability
A well-attached gazebo needs upkeep to stay safe. Seasonally, tighten all fasteners and inspect for wear.
Clean the structure with mild soap—avoid harsh chemicals that degrade materials. For wood, apply stain or sealant every 1-2 years to fend off rot.
In winter, remove snow promptly; use a soft broom to avoid scratches. Store cushions indoors to prevent mold.
Pest control is key; termites love wood decks and gazebos. Treat with borate solutions if needed.
If damage occurs, repair immediately—loose posts can compromise the whole setup. Professional help for major fixes ensures safety.
Enhancing Your Outdoor Space Further
Once your gazebo is securely attached, think about integrations like lighting or planters. String lights add ambiance without overloading the structure.
For privacy, add lattice panels, but secure them lightly to avoid wind sail effects. Integrate with landscaping—surround with plants for a natural feel.
If expanding, consider modular additions, but always reassess the deck’s capacity. A well-planned space becomes a backyard oasis.
In conclusion, attaching a gazebo safely requires careful planning, the right tools, and attention to detail. Follow these steps, and you’ll enjoy a stable, inviting addition to your outdoor area for years. If you’re looking to complement it with something like a modern shed, that could provide extra storage or a workspace nearby.