Water and basements have always had a complicated relationship. The basement sits below grade, surrounded by soil that holds moisture, pressed against a foundation that — no matter how well-built — will develop small cracks and porous sections over time. At some point, most homeowners will face some form of basement moisture problem. The question isn’t really if, it’s when and how bad.
How Water Gets Into Your Basement in the First Place
Most people assume water enters through obvious cracks they can see. Sometimes that’s true. But water is patient and creative, and it finds its way in through several routes that aren’t always visible to the untrained eye.
Hydrostatic Pressure
When the soil around your foundation becomes saturated — after heavy rain, snowmelt, or a sustained wet season — it exerts hydrostatic pressure against your foundation walls and floor. Concrete is porous enough that water under pressure can seep through even without a visible crack. You might notice damp patches on the wall, a wet floor after rain, or a persistent clammy feeling in the air. All of these can be hydrostatic pressure at work.
Foundation Cracks
Concrete shrinks slightly as it cures, and foundations settle over years as the soil beneath them compacts. Both processes create cracks — vertical ones along the wall, horizontal cracks near the midpoint of a wall (which are more structurally serious), and the common floor-wall joint crack where the footing meets the wall. Any crack that reaches the exterior face of the foundation is a direct water entry point.
Failed or Clogged Drainage Tile
Most homes built in the last several decades have weeping tile — perforated pipe installed around the perimeter of the footing to collect groundwater and direct it away from the foundation. Over time, this pipe can collapse, clog with sediment or roots, or simply stop functioning. When it does, water that used to be directed away accumulates instead, raising the hydrostatic pressure against your foundation significantly.
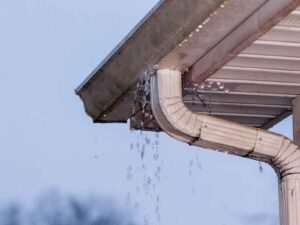
Window wells that lack proper drainage, downspouts that discharge too close to the house, and negative grading that slopes toward the foundation rather than away from it are also common contributors — and often the first things a good inspector will flag.
Interior vs. Exterior Waterproofing: What’s the Difference and Which Do You Need?
This is the question most homeowners ask first, and the honest answer is that it depends entirely on the source and severity of the problem. A thorough on-site assessment is the only reliable way to determine the right approach — which is why experienced local contractors like Aquatech Waterproofing in Scarborough conduct free inspections before recommending any course of action. What follows is a practical overview of how the two main approaches differ.
Interior Waterproofing
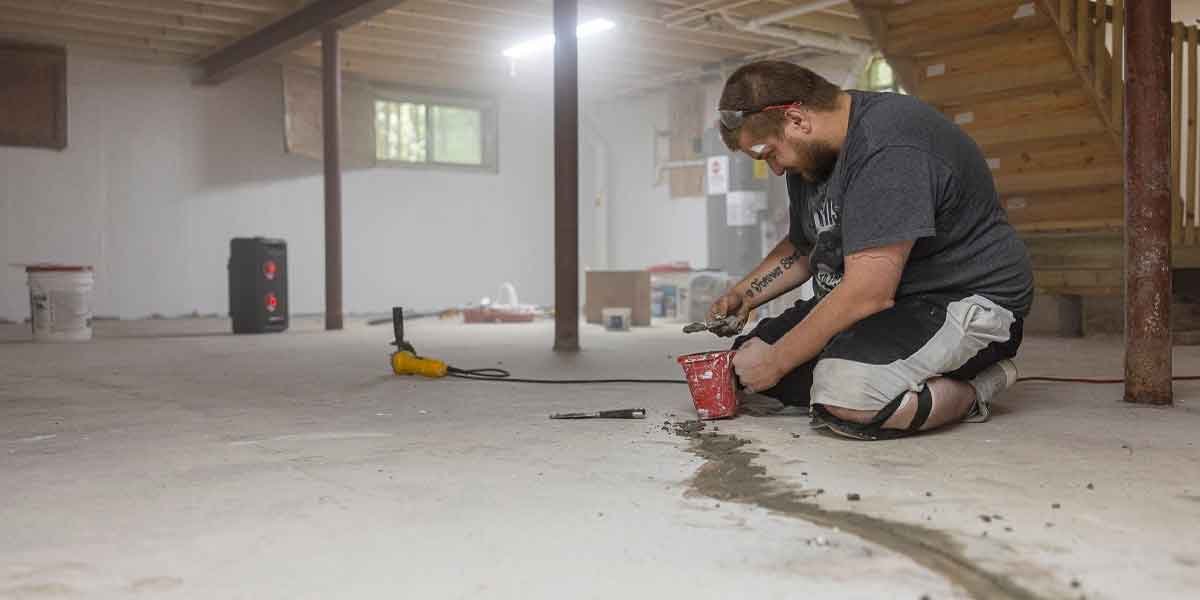
Interior waterproofing doesn’t stop water from entering the foundation — it intercepts water that has already entered and redirects it before it can cause damage. The typical system involves breaking up the concrete floor along the interior perimeter, installing a drainage channel in the aggregate below, and directing water to a sump pit where a pump discharges it away from the home.
This approach is less expensive than exterior work, causes less disruption to landscaping and exterior structures, and can often be completed in one or two days. It’s the right solution when the source of water entry is distributed along the wall-floor joint, when exterior access is limited, or when the goal is to manage water that enters despite a structurally sound foundation.
The limitation is that it doesn’t address the source. Water is still entering the foundation — it’s just being captured before it spreads. For some homes, that’s sufficient. For others, especially those with significant foundation cracking or serious hydrostatic pressure, interior drainage alone won’t be enough.
Exterior Waterproofing
Exterior waterproofing attacks the problem at the source. The process involves excavating the soil around the foundation down to the footing, cleaning the exposed foundation wall, applying a waterproof membrane (typically a rubber or polymer-based product), installing new drainage tile, and backfilling with clean, permeable material that drains freely.
It’s more invasive and more expensive than interior work. It also requires access around the perimeter of the home, which isn’t always possible in densely built neighbourhoods or on properties with fences, decks, or mature landscaping close to the foundation. But when done correctly, it’s the most complete solution — water is blocked at the wall rather than managed after entry.
Understanding the Costs — and What Drives Them
Waterproofing costs vary considerably based on the scope of work, the type of foundation, the depth of the footing, site accessibility, and regional labour costs. Providing a number without knowing those variables is guesswork — but understanding the cost drivers helps you evaluate quotes more accurately.
Interior Systems
Interior drainage systems are typically priced per linear foot of drainage channel installed. The total cost depends on how much of the perimeter is included, whether a new sump pit and pump are required, and whether existing concrete is thick or reinforced. A partial interior system addressing one or two walls will cost significantly less than a full perimeter installation.
Exterior Systems
Exterior waterproofing costs are driven primarily by excavation depth and perimeter length. Deeper footings require more excavation, which means more labour and disposal cost. Difficult site access — a narrow side yard, obstacles close to the wall — adds time and therefore cost. The membrane product selected, the condition of the existing drainage tile, and whether any foundation crack repair is needed alongside the waterproofing all factor in as well.
Crack Injection
Isolated foundation cracks can often be sealed with epoxy or polyurethane injection — a much less invasive and less expensive intervention than full waterproofing. Epoxy injection restores structural strength to the crack; polyurethane foam is more flexible and better suited to cracks with active water movement. The right material depends on the type of crack and whether it’s actively leaking at the time of repair.
The Warranty: What to Look For and What to Avoid
A waterproofing warranty is only as valuable as the company behind it. A lifetime warranty from a company that goes out of business in three years is worth nothing. When evaluating warranties, focus on three things.
First, duration and scope. A lifetime warranty that covers the drainage system, the membrane, and any labour to address failures is meaningfully different from a warranty that only covers materials. Read what’s actually included.
Second, transferability. A transferable lifetime warranty — one that passes to a new owner when you sell the house — is a genuine value-add and a selling point. Buyers notice it, and it signals that the company stands behind their work regardless of who owns the home.
Third, the claims process. Ask directly: if water returns within the warranty period, what happens? How quickly does the company respond? Is there a cost to you? A contractor who answers these questions clearly and confidently is one who expects their work to hold up. Hedging is a signal.
Before You Sign Anything: Questions Worth Asking
A few questions that separate contractors who know what they’re doing from those who don’t:
What is the specific source of water entry in my basement, and how did you determine that? A contractor who can’t answer this with specificity either hasn’t looked carefully enough or is proposing a solution regardless of the diagnosis.
What materials will you use, and can I see the product data sheets? This matters for both performance and indoor air quality — particularly for coatings and sealants applied to interior walls.
What does the site look like when you leave? Excavation, concrete cutting, and drainage installation all create significant mess. Understand up front what the contractor’s responsibility is for cleanup and restoration.
Who will actually be doing the work? The person who gives you a quote is not always the person who does the job. Ask whether the crew is employed directly by the company or subcontracted, and whether a supervisor will be on-site.
Can you provide references from projects similar to mine? Completed jobs, verifiable contacts, ideally projects you can see in person or through photos. A company with a real track record won’t struggle to answer this.