A loose door handle might seem like a minor inconvenience, but left unattended, it can turn into a bigger issue. Not only does it affect your home’s appearance, but it can also compromise your door’s security and make it difficult to open or close properly.
The good news? Fixing a loose door handle is one of the simplest DIY tasks you can tackle at home—quick, inexpensive, and usually done in under 20 minutes. Whether it’s your front door, bedroom door, or bathroom handle, following a few easy steps can restore that firm, reliable grip in no time.
Tools You’ll Need to Fix Door Handles
Before you begin, gather a couple of basic tools. You probably already have these lying around your home:
- Screwdriver: A Phillips or flathead screwdriver, depending on your handle type. Most interior door handles use Phillips screws, while older or decorative designs may require a flathead.
- Allen Wrench (Hex Key): Some modern door handles, particularly those with hidden or recessed screws, are fastened using hex screws that require an Allen wrench for tightening.
- Optional tools that can make the job smoother include a small flashlight (to see inside tight spaces) and a replacement screw set in case any of your existing screws are stripped or missing.
Identify the Problem
Before you start tightening everything in sight, take a few minutes to figure out exactly what’s causing the looseness.
1.Check if the screws are loose
Begin by examining both sides of the handle. Most door handles have visible mounting screws on one side of the plate. If the handle wobbles when you turn it, chances are one or more of these screws have worked themselves loose.
2.Inspect the handle for wear or stripped screws
If you tighten a screw but it keeps turning without tightening fully, it may be stripped. This happens when the screw threads or the hole they sit in have worn down. In such cases, you might need to replace the screw or use a slightly larger one to get a snug fit.
3.Determine if the latch mechanism is misaligned or faulty
If your handle feels firm but the latch still doesn’t catch or retract properly, the problem could be with the latch mechanism. Misalignment between the latch and strike plate may cause the handle to feel loose or fail to engage the door properly.
Step-by-Step Fix
Once you’ve identified what’s wrong, it’s time to get hands-on. Follow these steps to restore your door handle to perfect working condition:
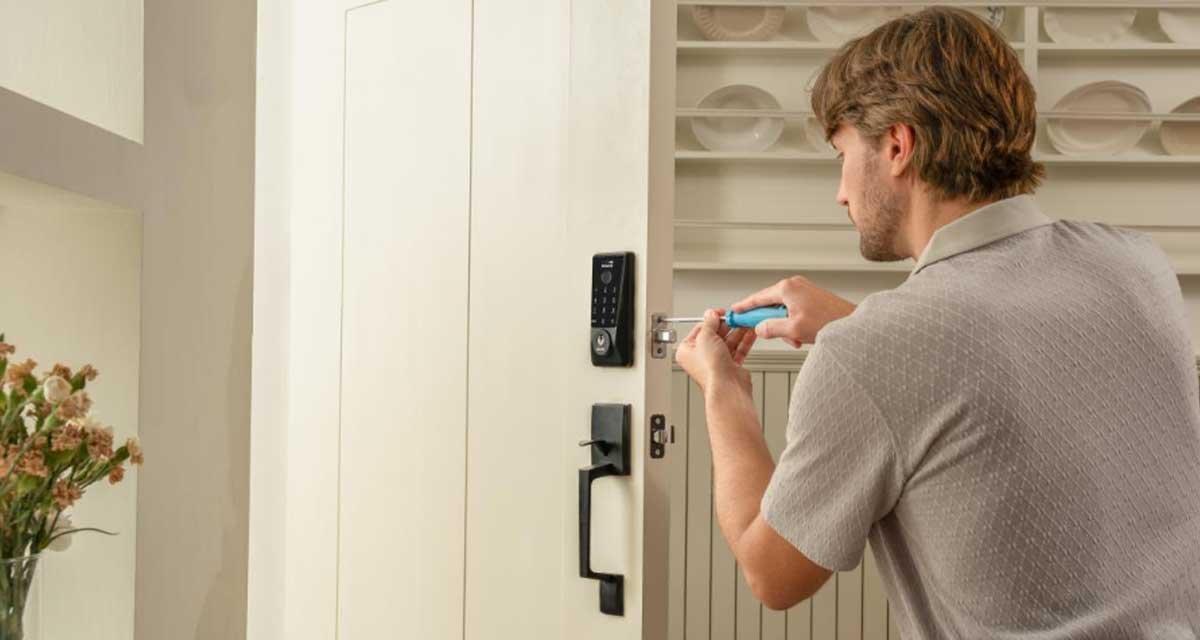
1.Tighten the screws on the handle
Remove any decorative cover plates (known as rosettes) if they hide the screws. Use your screwdriver to tighten each screw evenly. Be careful not to overtighten—too much pressure can strip the screw holes or crack the hardware.
If your handle uses a set screw (a small screw located on the side of the handle’s neck), use your Allen wrench to snug it up. This set screw secures the handle to the spindle (the metal rod connecting both sides of the handle).
2.Tighten the screws on the latch plate
The latch plate is the small metal plate on the edge of the door where the latch bolt extends. Over time, repeated use can loosen it, causing the latch to sit crooked and the handle to feel unstable. Use your screwdriver to tighten the two screws holding the latch plate firmly against the door edge.
3.Adjust the alignment of the latch if needed
If tightening the screws doesn’t fix the problem, close the door slowly and observe how the latch meets the strike plate on the door frame. If it doesn’t line up properly, you may need to adjust the strike plate slightly. Loosen its screws, shift it up or down as needed, and then retighten. A properly aligned latch ensures smooth operation and less wear on the handle over time.
4.Replace stripped screws or the handle if necessary
If you discover stripped screws, replace them with new ones of the same size—or slightly larger if the old holes are worn. For severely damaged screw holes, you can fill them with a wooden toothpick or matchstick dipped in wood glue, let it dry, and reinsert the screw for a tighter grip.
If the handle itself is cracked, corroded, or broken, replacing it might be the better long-term solution. Door handles are inexpensive and come in various styles.
5.Test the door handle to ensure it works smoothly
Once everything is tightened and aligned, give the handle a few test turns. The handle should rotate smoothly, retracting and extending the latch without sticking or grinding. Check both sides of the door and make sure the latch fully engages with the strike plate when closed.
If the door now opens and closes effortlessly, congratulations—you’ve just completed a successful DIY fix!
When to Replace the Lock
Sometimes, no matter how carefully you tighten and adjust, a loose or faulty handle just won’t cooperate. If you notice that your handle keeps coming loose, or the latch mechanism feels worn out even after multiple fixes, it may be time to replace the entire assembly.
Replacing your handle or lock doesn’t have to be a hassle—in fact, it’s the perfect opportunity to upgrade to a more modern, secure option. One standout choice is the DESLOC D110 Plus Smart Lock, a sleek, high-tech solution that combines convenience, style, and security.
The DESLOC D110 Plus offers features that go far beyond a traditional door lock:
- Quick Installation: Mounts easily using just one screwdriver, no complex wiring required.
- AutoSense Technology: Automatically detects whether your door swings left or right for user-friendly installation.
- FlashPrint Algorithm: Recognizes fingerprints in just 0.3 seconds with an accuracy rate of over 99%.
- Built-in Wi-Fi: Enables remote control and real-time alerts. No additional hubs required.
- 6-in-1 Unlocking Options: Choose between fingerprint, PIN code, fob, physical keys, voice assistant, or app control for ultimate flexibility.
Final Thoughts
Fixing a loose door handle might sound like a small task, but it’s one that can make a big difference in your daily life. By tackling small repairs like this on your own, you save money, extend your hardware’s life, and gain a bit more confidence in your DIY skills. So next time your door handle starts to wobble, don’t ignore it—grab your tools, follow these steps, and give your door the firm, secure grip it deserves.