So you’re thinking about shingling your own roof. Maybe you’ve watched a few YouTube videos and figured “I can do that.” Well, you probably can, but there’s a lot those quick videos don’t tell you. I’ve been there – halfway through a roof job wondering what I got myself into. Let me save you some headaches.
Tools You’ll Actually Need vs. What You Can Skip
You don’t need to buy out the hardware store. Seriously. Here’s what’s actually essential:
- Roofing hammer (the one with the gauge on it)
- Utility knife with LOTS of extra blades
- Chalk line
- Roofing nails (1¼” for new installation, 1½” for tear-offs)
- Ladder that extends 3 feet above the roof edge
- Roof jacks and planks if your roof is steep
Skip the fancy roofing nail guns when you’re starting out. Yeah, they’re faster, but they’re expensive to rent and easy to mess up with. The depth setting is tricky, and you can easily blow through shingles if you’re not careful.
Safety First: Staying Alive on Your Roof
I can’t stress this enough. Roofs are dangerous. Most people don’t realize how sketchy it feels up there until they’re actually standing on a slope 20 feet off the ground.
Wear shoes with good traction. Old sneakers are terrible – they’ll slip. Get a safety harness if your roof is steeper than 6/12 pitch (that’s a 50% grade). Work with someone else around, at least within shouting distance.
And please don’t roof when it’s wet, windy, or going to be either soon. The shingles get slippery, you get slippery, and nobody wins.
Tear-Off or Second Layer: Making the Call
This is a big decision. Tearing off the old roof is messy, exhausting work. It adds at least a full day to your project. But sometimes you have no choice.
You can’t put a third layer on – it’s against code pretty much everywhere and too heavy for most structures. If your current roof has bumps, dips, or curled shingles, you gotta tear off.
Tearing off gives you the chance to inspect the sheathing too. You might find rotted spots that need replacing, and it’s way better to find them now than when they crash through your ceiling later.
This critical decision often benefits from professional assessment. Experienced Chester roofing contractors can evaluate your existing roof layers, identify hidden structural issues, and recommend the best approach based on your specific situation.
Getting Your Roof Surface Ready
After tear-off (or if you’re going over existing shingles), make sure the surface is clean and flat. Old nails sticking up will puncture your new shingles. Missing or rotted sheathing needs to be replaced.
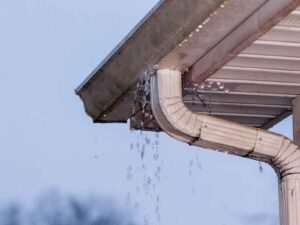
Install new drip edge along the eaves (bottom edge) and rake edges (sides) of your roof. This seems like a small detail but it’s super important for directing water away from the wood underneath.
Your underlayment matters too. In most places, you need at least 15-pound felt paper. In areas with ice dams, you need ice and water shield along the bottom edge. This is sticky, frustrating stuff to work with, but it’ll save your ceilings when winter hits.
Starter Strips: The Foundation Most DIYers Mess Up
Don’t skip starter strips. Just don’t. They seal down the first row of shingles and prevent wind from getting underneath. You can buy pre-made starter strips or make them by cutting the tabs off regular shingles.
The starter strip goes under the first row and sticks out about 1/4 to 3/8 inch beyond the drip edge. Many people mess this up and it causes problems later.
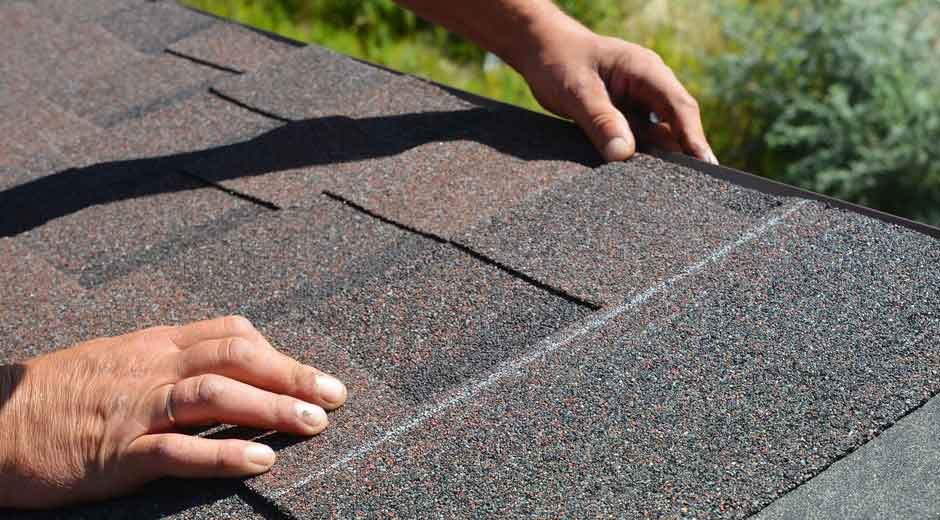
Nailing Patterns That Won’t Leak Later
Each shingle needs 4-6 nails depending on your local wind conditions and shingle manufacturer. The nail line is usually marked on the shingles.
If you put nails too high, they’ll be exposed to the weather. Too low, and they’ll go through both layers of shingle where they overlap. Either way means leaks.
And don’t hammer the nails in too deep or too shallow. They should be flush with the shingle, not denting it and not sticking up. This takes some practice.
Tackling Valleys and Problem Areas
Valleys (where two roof sections meet) are leak central. There are a few different ways to shingle them – open valleys with metal flashing or closed valleys where shingles from both sides overlap.
Whichever method you use, make sure water can flow freely. Valleys collect a lot of water during rain, and it needs somewhere to go.
Chimneys, vents, and skylights need special attention too. Flashing has to tuck under shingles above and over shingles below. Get this backward and you’re guaranteed leaks.
Thinking Beyond the Roof: A Fresh Coat of Paint
While you’re already tackling major exterior work, it might be the perfect time to consider refreshing your house paint. A clean, well-sealed roof pairs beautifully with a fresh coat of paint on your siding, trim, and eaves. Not only does it boost curb appeal, but it also protects your home’s surfaces from moisture and UV damage. If you notice peeling, fading, or exposed wood during your roofing prep, it’s worth adding house painting to your to-do list. Many homeowners choose to coordinate the two projects so everything looks new and cohesive from the street.
Proper Ridge Cap Installation
The ridge cap finishes the peak of your roof. You can make your own by cutting regular shingles into thirds, but pre-made ridge caps are easier and often have better wind ratings.
Nail them down starting at the end opposite the prevailing wind direction, overlapping each piece like regular shingles.
Weather Timing: When to Start and When to Stop
This is huge. Shingles need heat to seal properly. If it’s below 50°F, they might not seal until next summer. That means wind can get under them all winter.
Ideally, you want several days of dry, mild weather. Rain obviously stops work, but high humidity can make the felt paper bubble up too.
Most DIYers underestimate how long roofing takes. A small, simple roof might take a weekend. Anything complicated could be a week or more. Plan accordingly, and have tarps ready just in case weather catches you mid-job.
Good luck, and remember – if things get too overwhelming, there’s no shame in calling a pro to finish up.